Earlier this week I became tired of the car wobbling to a stop thanks to knackered front discs so I did…:
Front Brake Replacement With** Tar·Ox **G88 Discs & Ferodo DS2500 Pads
Equipment:
Trolley Jack
Axle Stands (x2)
Hammer (Large)
¾in Socket Set
Flat-Bladed Screwdriver
Can or tin of brake cleaner
Common Sense
Mug Of Tea (Large)*
Chocolate Digestives*
-
- Optional
Items Bought:
**Tar·Ox ** G88 Front Discs (Pair)
Ferodo DS2500 Front Pads (2x Pair)
From: Amber Performance, Approx. £345 (Inc. Postage, GTOUK Discount… etc)
            Tel: 01582 572 500
            Web: www.amber-performance.co.uk
DISCLAIMER: The procedures described in this guide are given without consideration for general stupidity. Neither the club nor the author of this article take any responsibility for injuries or damage caused by this guide. I am strictly an amateur in terms of car mechanics and repairs and the guides I write are based purely on my own experiences.
Step 1: Assemble all tools and new components in a convenient place near the car (saves you trekking back and forth when you need something).
Step 2: Jack car up, support on axle stands, remove wheel and place to one side.
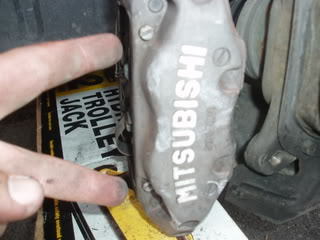
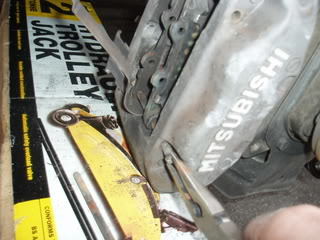
Step 3: Locate and remove caliper bolts - these are the two large (17mm) bolts on the back of the caliper - one at the top, one at the bottom.

(Top Bolt From Underneath)
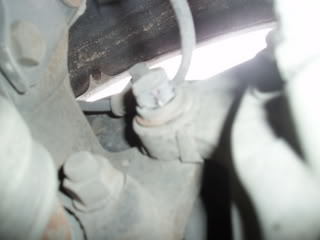
(Top Bolt Without Socket Attached…)
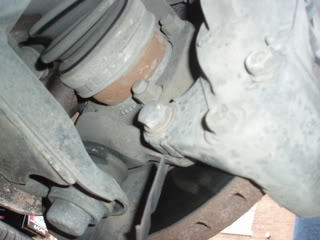
(Bottom Bolt)
Step 4: Ease caliper off old disc - the caliper should slide off with a little resistance. Once the caliper is off, support it rather than leave it hanging by the brake lines (I used the trolley jack box). Also remove lid from brake fluid reservior to allow excess air to escape.
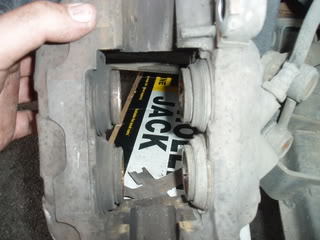
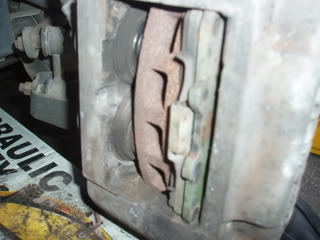
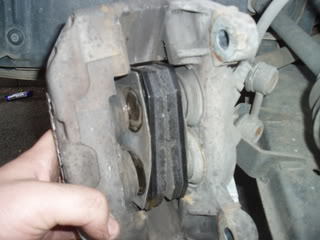
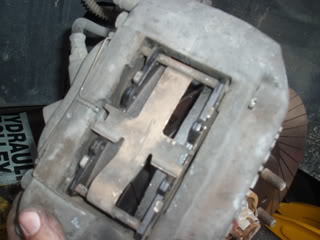
Step 5: Remove the wire at the back of the caliper, and extract the two pins holding the pads in place (indicated in pic by my two fingers). BEWARE of the spring loaded clip holding the calipers in place - keep a thumb pressed on it while you remove the first pin. Remove the pads and place to one side. Compress the ‘pots’ back into the caliper, and leave to one side for now. (To compress the pots I place the caliper back in position on the disc, secure with one loose bolt and push each pot in. Once each one is pushed in, wedge it with something to stop it extending when you compress the next pot - repeat for all 4 pots).
(The ‘safety wire’. Remove this first - it passes through both retaining pins)
(The two retaining pins)
(Removing the retaining pins - the piece of metal stuck outward at a 45° angle to the left is the sprung retaining clip)
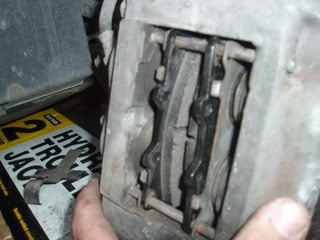
(The problem - 4 extended ‘pots’)
(The solution - i simply put the caliper back in place, pushed the pots in individually and wedged them with the old pads while i did the others)
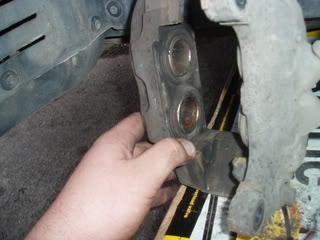
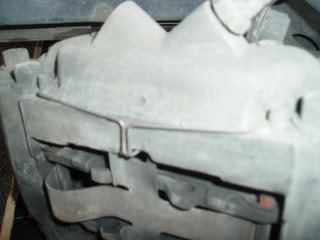
(This is what you should end up with - ready for new pads)
Step 5: Remove old disc. This may need some ‘persuasion’. If you have two appropriately sized bolts these can be worked into two threaded holes in the hub surface of the disc and the disc pushed off the hub, or insert a two-legged puller and use that to remove the disc. I had neither, so this is where the hammer came in useful, by hitting the disc on four points in a North-East-South-West pattern, so the disc rocked back and forth and eventually worked itself free.
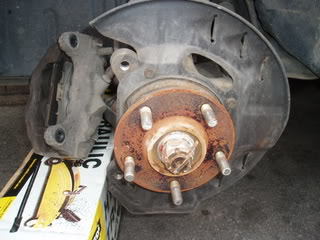
(The hub after disc removal)
Step 6: Most new discs are lightly coated with a rust preventative, this needs to be cleaned off prior to fitment of the discs or it will contaminate the new pads. This is where a can or tin of brake cleaner comes in handy, this is available from any auto factor. Spray or wipe it on with a clean rag and wipe off any oily disc protector, the brake cleaner will evaporate anyway after a short time.
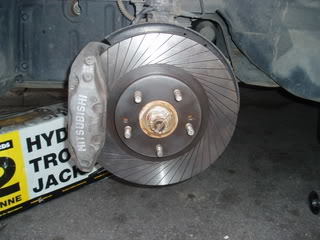
Clean the bare hub of all surface rust and lightly brush off the studs as well, then fit the new disc.
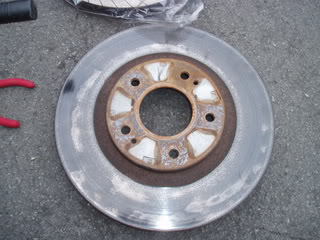
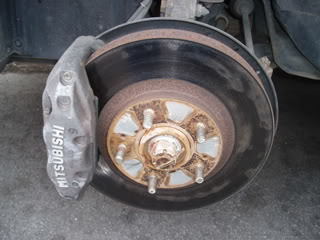
(The old disc)
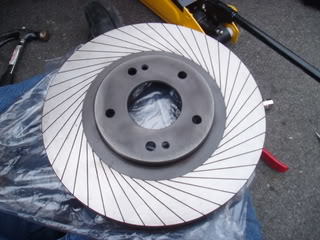
(The new disc - they are ‘handed’ - this is the O/S/F disc)
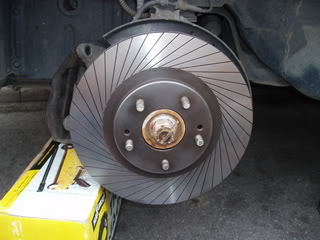
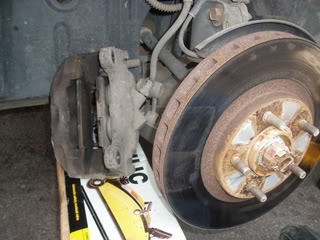
(The N/S/F disc in place)
Step 7: Fit the new pads into the caliper, making sure you retain and re-use the pad shims that should have come out with the old pads. Hold with one pin, insert the spring clip and then insert the 2nd pin.
(Assembly is basically the reverse of dis-assembly…)
(And if you do it right you should end up with something like this…)
Step 8: Insert the wire that secures the pins in place on the caliper and bolt the caliper back onto the strut.
Step 9: Fit wheel.
(Done! - Except for the other side…)
Step 10: Before driving anywhere, depress the brake pedal a few times to allow the pistons to regain full pressure and press the pads onto the discs. Failure to do this will result in ‘No Brakes’ momentarily. This could potentially be very dangerous.
Don’t forget to let the pads ‘bed in’ otherwise your time and money will be wasted…
Any questions/comments post them below…
Cheers
